
How To Fix A Roof Leak Helena MT: DIY Repair Guide for Homeowners
Roof Leak Repair Helena Montana
Living in Helena, Montana, means your roof must withstand severe weather conditions, including heavy snow, high winds, hailstorms, and fluctuating temperatures. These elements can take a toll on your roof, leading to issues that require timely attention. While professional roofing contractors are essential for major repairs, many minor roof problems can be tackled by homeowners attempting to repair their own roof. However, it’s important to recognize when a job requires professional expertise to ensure you repair successfully. For example, if your roof has extensive damage or you’re dealing with leaks that persist despite your efforts, calling in the experts ensures a safe and effective solution. Consider reaching out to Ellingson Roofing LLC, a trusted name in Helena, Montana, for professional roof repair services. This guide provides detailed instructions for inspecting and repairing shingle, metal, and other roofing materials. Always prioritize safety and seek professional help for complex or dangerous tasks.
Additionally, the roof's flashing plays a crucial role in preventing leaks and water damage, making it essential to maintain and inspect regularly.
Investing in a new roof can significantly enhance the sale potential and overall value of your property.
Understanding Roof Leaks
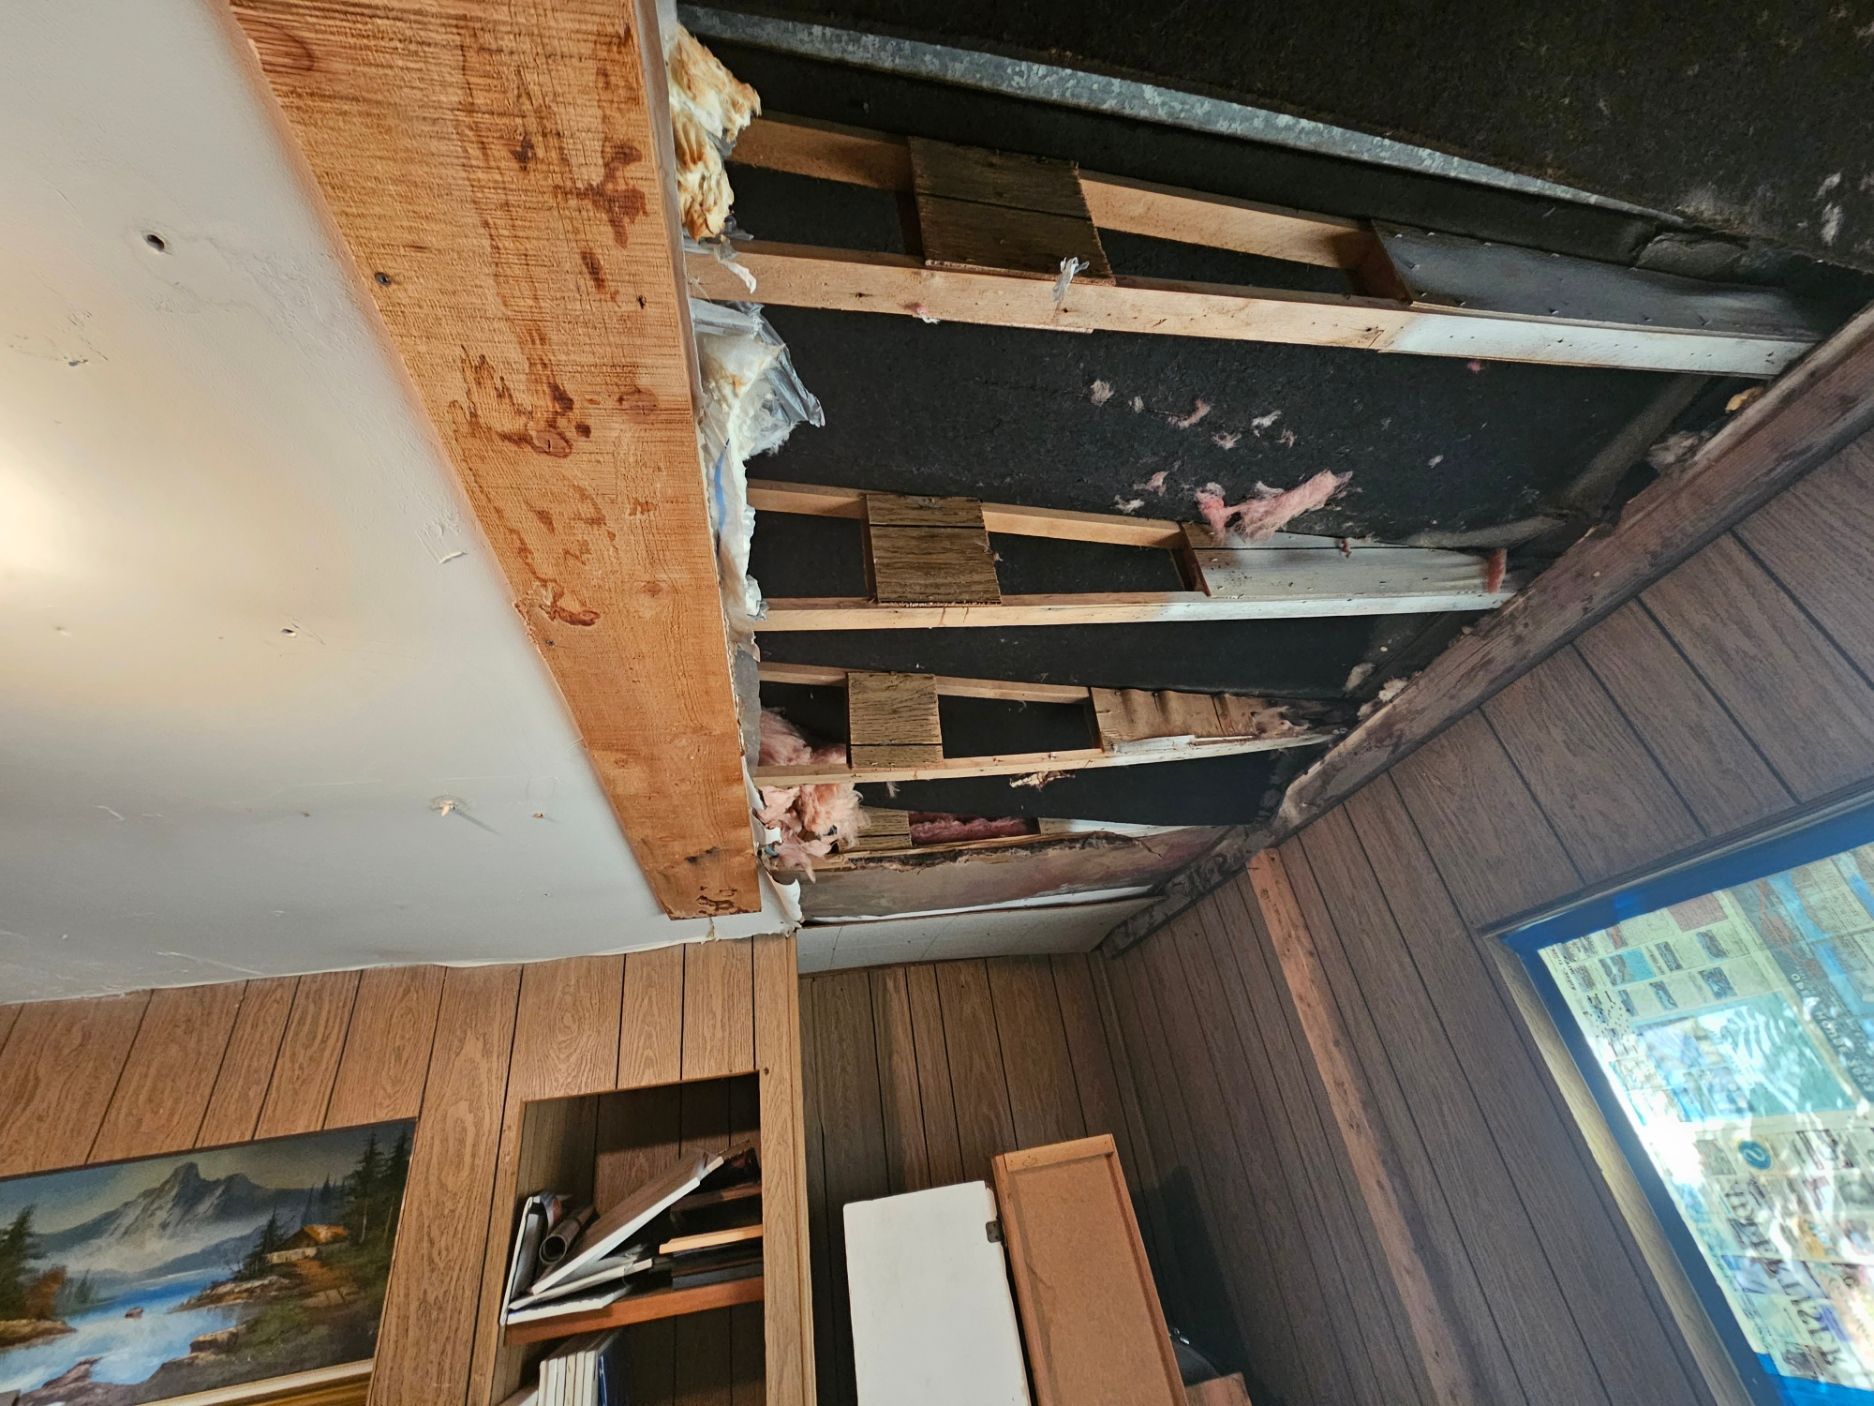
Roof leaks can be a frustrating and costly issue for homeowners. Understanding the causes and signs of roof leaks is crucial to addressing the problem promptly and effectively. Roof leaks can occur due to various reasons, including damaged or missing shingles, issues with the roof's flashing, clogged gutters, and improper roof installation. Signs of roof leaks may include water stains on ceilings and walls, dripping sounds, and musty odors. Regular roof maintenance and inspections can help identify potential issues before they become major problems.
Identifying and Locating Roof Leaks
Identifying and locating roof leaks can be a challenging task, but it’s essential to address the issue promptly to prevent further damage. Here are some steps to help you identify and locate roof leaks:
- Look for signs of water damage: Check your ceiling, walls, and floors for water stains, discoloration, or warping. These signs can indicate a roof leak.
- Inspect your roof: Check your roof for damaged, missing, or loose shingles, curled or buckled shingles, and signs of wear around chimneys, vents, and skylights.
- Check your gutters: Clogged gutters can cause water to back up and seep into your roof. Make sure your gutters are clean and functioning properly.
- Use a flashlight: Shine a flashlight into your attic or crawl space to look for signs of water damage or leaks.
- Check for musty odors: A musty smell can indicate a roof leak, especially in areas with poor ventilation.
Once you’ve identified a roof leak, it’s essential to locate the source of the leak. Here are some steps to help you locate the source:
- Check the roof’s flashing: Flashing is the material around chimneys, vents, and skylights. Check for damaged or missing flashing, which can cause leaks.
- Inspect the roof’s valleys: Valleys are the areas where two slopes of the roof meet. Check for damaged or missing shingles, which can cause leaks.
- Check the roof’s edges: Check the edges of the roof for damaged or missing shingles, which can cause leaks.
- Use a hose: Use a hose to simulate rainfall and check for leaks. Start at the lowest point of the roof and work your way up.
By following these steps, you can identify and locate roof leaks, and address the issue promptly to prevent further damage.
Preparing for DIY Roof Repair
Before embarking on a DIY roof repair project, it’s essential to prepare properly. This includes gathering the necessary materials and tools, such as roofing adhesive, shingles, and a ladder. Homeowners should also ensure they have a clear understanding of the repair process and have consulted relevant resources, such as online tutorials or roofing manuals. Additionally, it’s crucial to take necessary safety precautions, including wearing protective gear and ensuring a stable ladder. By preparing thoroughly, homeowners can ensure a successful and safe DIY roof repair experience.
Why Regular Roof Inspections Are Essential
Your roof serves as the primary barrier between your home and the elements. Neglecting it can lead to costly repairs and structural damage. Regular roof inspections, ideally conducted twice a year—in spring and fall—and after major storms, can help you identify and address issues early. During inspections, pay attention to:
- Torn or Missing Shingles: Look for shingles that are cracked, curled, blistered, or absent.
- Loose or Damaged Flashing: Inspect the roof's flashing around chimneys, vents, and valleys for signs of rust, looseness, or gaps. Proper installation and maintenance are crucial to prevent severe water damage.
- Exposed or Raised Nails: Identify nails that have popped out or are no longer secure.
- Old or Deteriorated Pipe Boots: Check rubber boots around plumbing vents for cracks or tears.
- Damaged Foam Closures on Metal Roofs: Examine foam closures for signs of corrosion, which can lead to leaks.
- Gutters and Downspouts: Ensure gutters are clear of debris to prevent water backup and roof damage.
- Flat Roofs: Regularly inspect flat roofs for issues like ponding water, which can lead to leaks and damage. Use appropriate sealants for effective repair.
Finding and Fixing Roof Leaks
Finding and fixing roof leaks requires a systematic approach. Homeowners should start by inspecting the roof for signs of damage or wear, such as missing or damaged shingles, cracked flashing, or clogged gutters. Once the source of the leak is identified, homeowners can begin the repair process. This may involve applying roofing adhesive, replacing damaged shingles, or repairing flashing. It’s essential to repair successfully to prevent further damage and ensure a watertight seal.
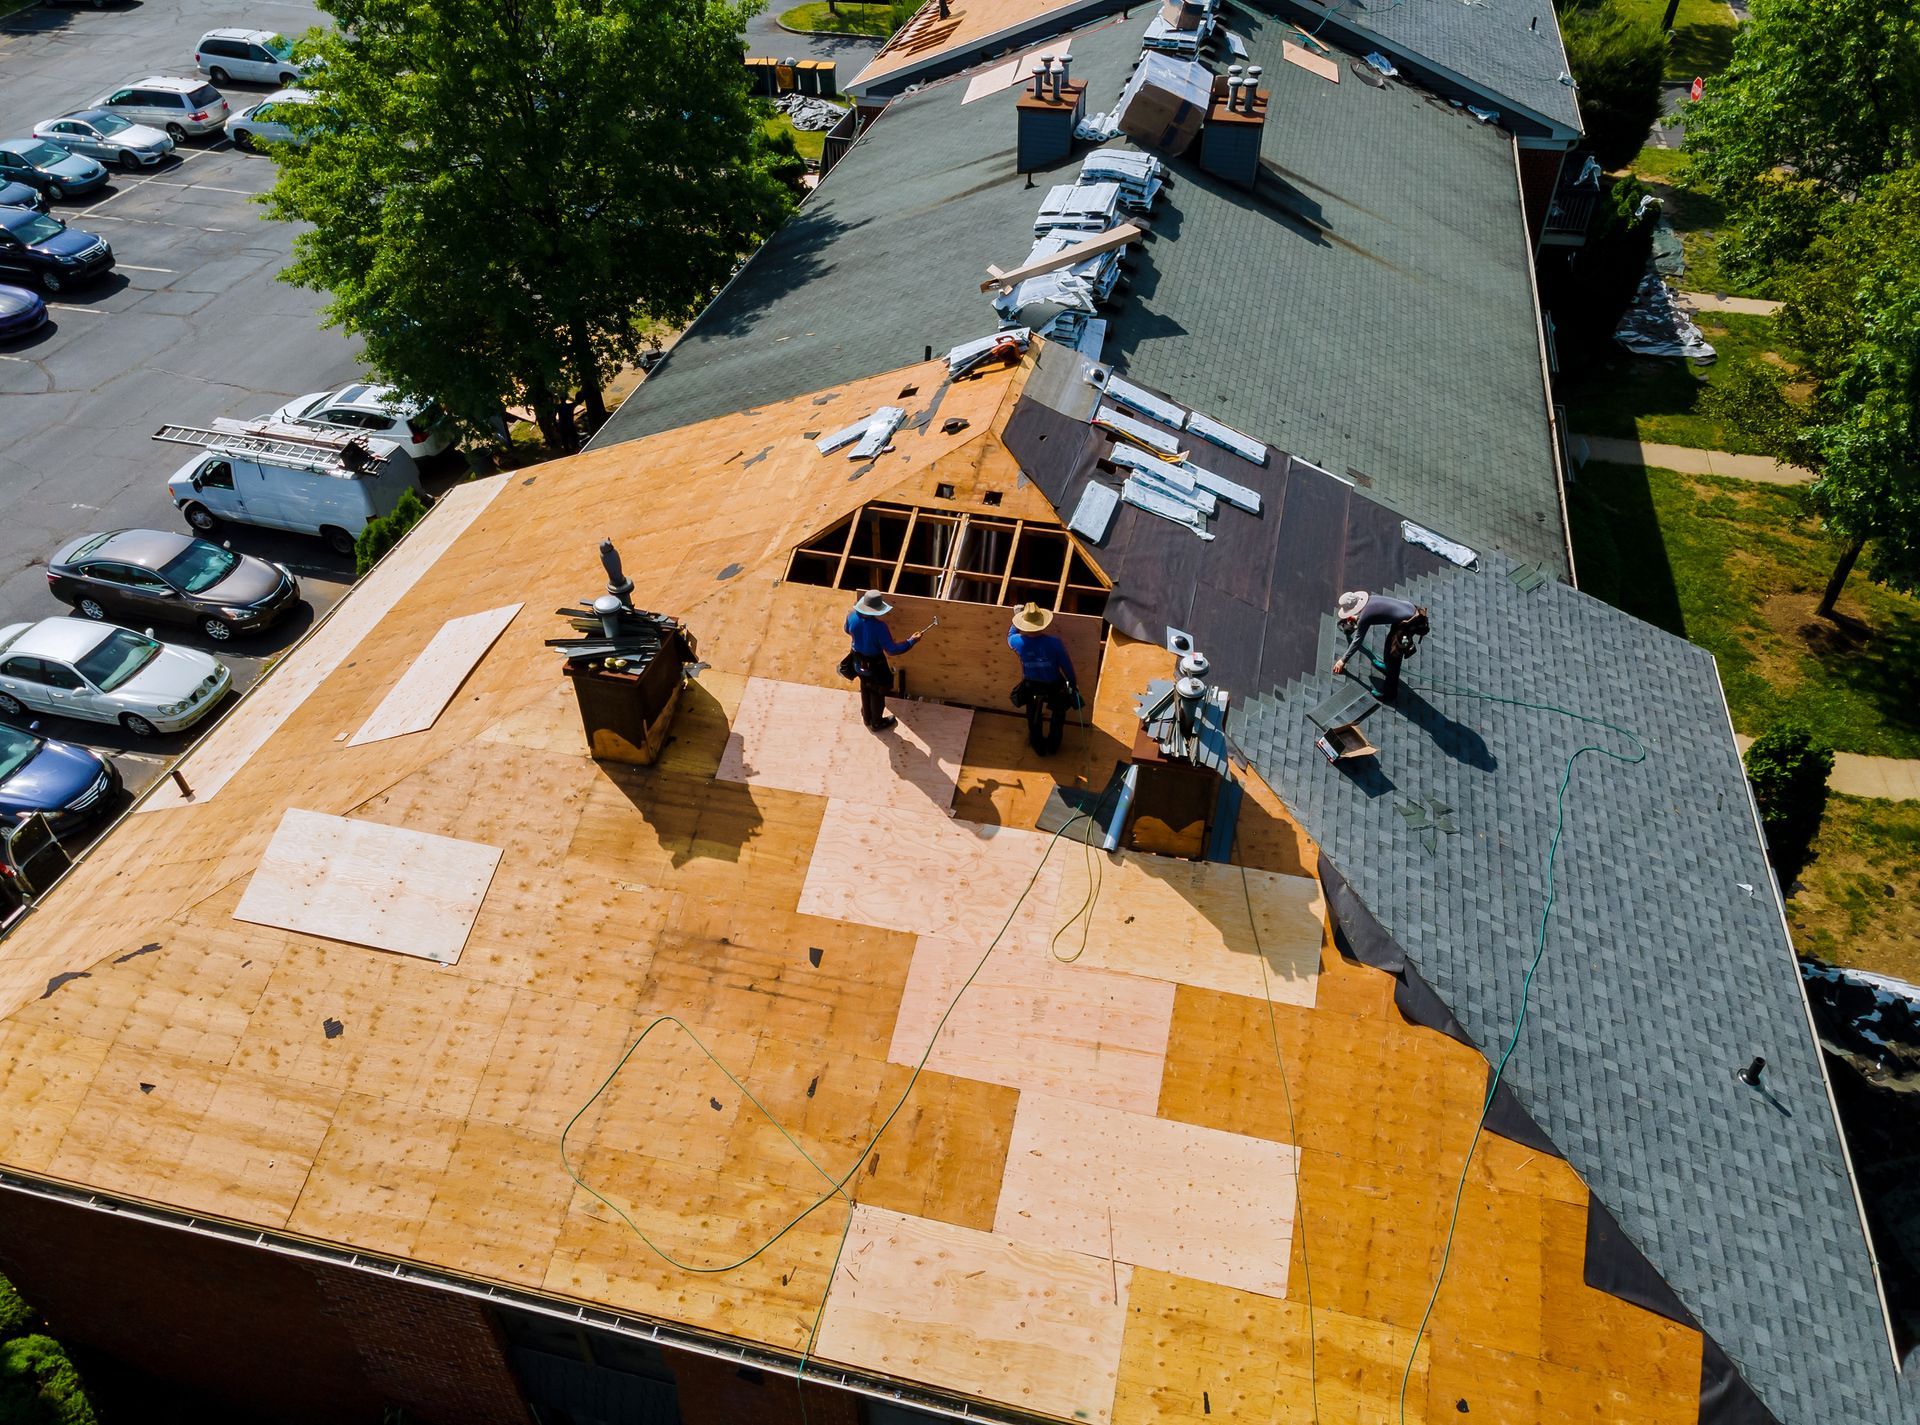
Detailed DIY Repairs for Shingle Roofs
Replacing Missing Shingles
Tools and Materials Needed: Flat pry bar, hammer, roofing nails, replacement shingles, roofing adhesive, utility knife.
Steps:
- Carefully lift the shingles directly above the missing one using a flat pry bar to expose the nails holding the damaged shingle, an essential part of the shingle replacement process.
- Use the pry bar to remove the nails and slide out the damaged shingle.
- Cut the replacement shingle to fit if necessary.
- Slide the new shingle into place, aligning it with the existing shingles.
- Secure the shingle with roofing nails. Place nails approximately 1 inch above the cutout slots.
- Apply a small amount of roofing adhesive beneath the tabs of the new shingle and press it firmly to seal.
Repairing Torn Shingles
Steps:
- Lift the damaged shingle tab and apply roofing adhesive to the underside of the torn area.
- Press the shingle down and weigh it with a heavy object, such as a brick, until the adhesive cures.
- For severe tears, consider replacing the shingle entirely.
Fixing Raised Nails
- Hammer the nail back into place if it’s still usable.
- Replace bent or loose nails with new roofing nails. Ensure they are flush with the shingle surface.
- Apply roofing adhesive over the nail head to seal and prevent leaks.
In-Depth Repairs for Metal Roofs
Replacing Screws on Metal Roofs
Tools and Materials Needed: Screw gun, replacement screws (slightly larger than the originals), silicone sealant.
Steps:
- Locate and remove the old screw using a screw gun.
- Inspect the hole for signs of wear or damage. If the hole is enlarged, use a larger screw.
- Insert the new screw and tighten it securely without overdriving, which can strip the material.
- Apply a bead of silicone sealant around the screw head to ensure a watertight seal.
Replacing Corroded Foam Closures
Tools and Materials Needed: Foam closure strips, utility knife, adhesive.
Steps:
- Remove the old foam closure by cutting it out with a utility knife.
- Clean the area thoroughly to remove debris and old adhesive.
- Cut the new foam closure strip to fit the required length.
- Apply adhesive to the area and press the foam closure into place firmly. Allow the adhesive to set according to the manufacturer’s instructions.
Sealing Leaks on Metal Roofs
- Identify the source of the leak by inspecting the roof from both the interior and exterior.
- Clean the area around the leak to ensure proper adhesion.
- Apply a generous layer of silicone or polyurethane sealant over the leak, spreading it evenly with a putty knife.
Handling Water Intrusion on Metal Roofs
Flat roof maintenance is crucial to prevent water intrusion, which is often caused by deteriorated foam closures or loose screws. If left unaddressed, it can lead to mold, insulation damage, and structural issues. Replacing foam closures and ensuring screws are secure are effective ways to mitigate this problem. For persistent leaks, consider installing a waterproof underlayment beneath the metal panels.
Evaluating Your Roof Repair Options
When evaluating roof repair options, homeowners should consider several factors, including the extent of the damage, the age and condition of the roof, and their budget. Homeowners may choose to repair their roof themselves, hire a local roofing contractor, or replace the roof entirely. It’s essential to weigh the pros and cons of each option and consider factors such as cost, safety, and long-term durability. By evaluating their options carefully, homeowners can make an informed decision that meets their needs and ensures they repair successfully for a safe and secure roof.
Common Mistakes to Avoid in Roof Repairs
When it comes to roof repairs, it’s essential to avoid common mistakes that can lead to further damage, safety hazards, and costly repairs. Here are some common mistakes to avoid:
- Not addressing the underlying issue: Failing to address the root cause of the problem can lead to further damage and costly repairs. Make sure to identify and address the underlying issue.
- Using the wrong materials: Using incompatible materials can lead to further damage and safety hazards. Ensure you use materials that are suitable for your roof type and meet local building codes.
- Not following safety protocols: Roof repairs can be hazardous, especially when working at heights. Always follow safety protocols, such as wearing proper gear and using safety harnesses.
- Not inspecting the roof thoroughly: Failing to inspect the roof thoroughly can lead to missed damage and further repairs. Make sure to conduct a comprehensive inspection before starting repairs.
- Not hiring a professional: While DIY roof repairs can be cost-effective, they can also lead to further damage and safety hazards. Consider hiring a professional roofer for a roof repair in Helena MT, especially for complex repairs.
- Not maintaining the roof: Failing to maintain the roof can lead to further damage and costly repairs. Perform regular roof maintenance, such as cleaning gutters and inspecting the roof for damage.
- Not using roofing adhesive: Failing to use roofing adhesive can lead to further damage and safety hazards. Use roofing adhesive to seal gaps and cracks.
- Not replacing damaged shingles: Failing to replace damaged shingles can lead to further damage and costly repairs. Replace damaged shingles promptly.
- Not inspecting the roof’s flashing: Failing to inspect the roof’s flashing can lead to further damage and costly repairs. Regularly inspect the roof’s flashing.
- Not considering local building codes: Failing to consider local building codes can lead to costly repairs and safety hazards. Ensure your roof repairs comply with local building codes.
By avoiding these common mistakes, you can ensure a successful roof repair and prevent further damage and costly repairs.
Additional Tips for Roof Maintenance and Repair
Safety Precautions:
Use a sturdy ladder and ensure it is placed on a flat, stable surface.
Wear non-slip footwear and a safety harness if working on a steep or high roof.
Avoid working in wet, icy, or windy conditions.
- Inspect After Severe Weather:
- Check for storm damage, such as hail dents, wind-lifted shingles, damaged solar panels and clogged gutters.
- Address water damage to roof shingles promptly to prevent mold growth and structural issues. Consider roof shingle replacement if there is significant environmental damage, and be aware of the challenges in finding matching shingles.
- Prevent Ice Dams:
- Install heat cables along the roof edge and ensure adequate attic insulation to reduce ice buildup.
- Clean Your Gutters:
- Clear gutters and downspouts regularly to prevent water pooling, which can damage roofing materials.
When to Call a Professional
While this guide covers many DIY roof repair tasks, some situations require professional expertise. Issues like widespread water intrusion, damaged structural components, or repairs on high or steep roofs are best left to seasoned professionals. Ellingson Roofing LLC specializes in such expert roof repairs and guarantees high-quality workmanship, ensuring the safety and longevity of your roof. Call a licensed roofing contractor if:
- The roof damage is extensive or structural.
- You’re uncomfortable working at height or on steep slopes.
- Repairs involve large sections of roofing or complex materials.
Conclusion
Roof maintenance is a critical aspect of homeownership in Helena, Montana. By conducting regular inspections and addressing minor repairs promptly, you can protect your home and extend the lifespan of your roof. While DIY projects can save money, always prioritize safety and call in professionals when necessary. Your roof is your home’s shield against the elements—keep it strong and secure.


SERVICE AREAS
MONTANA
Kalispell, MT - Missoula, MT
Great Falls, MT - Butte, MT
Shelby, MT - Bozeman, MT
Big Sky, MT - Belgrade, MT
Anaconda, MT - Helena, MT
GEORGIA
Fayetteville, GA - Peachtree City, GA
Whitewater, GA - Fairburn, GA
CONTACT
CONNECT
© Ellingson Roofing LLC 2024 All Rights Reserved - Proudly Created with Bozeman SEO Pro & Ellingson SEO